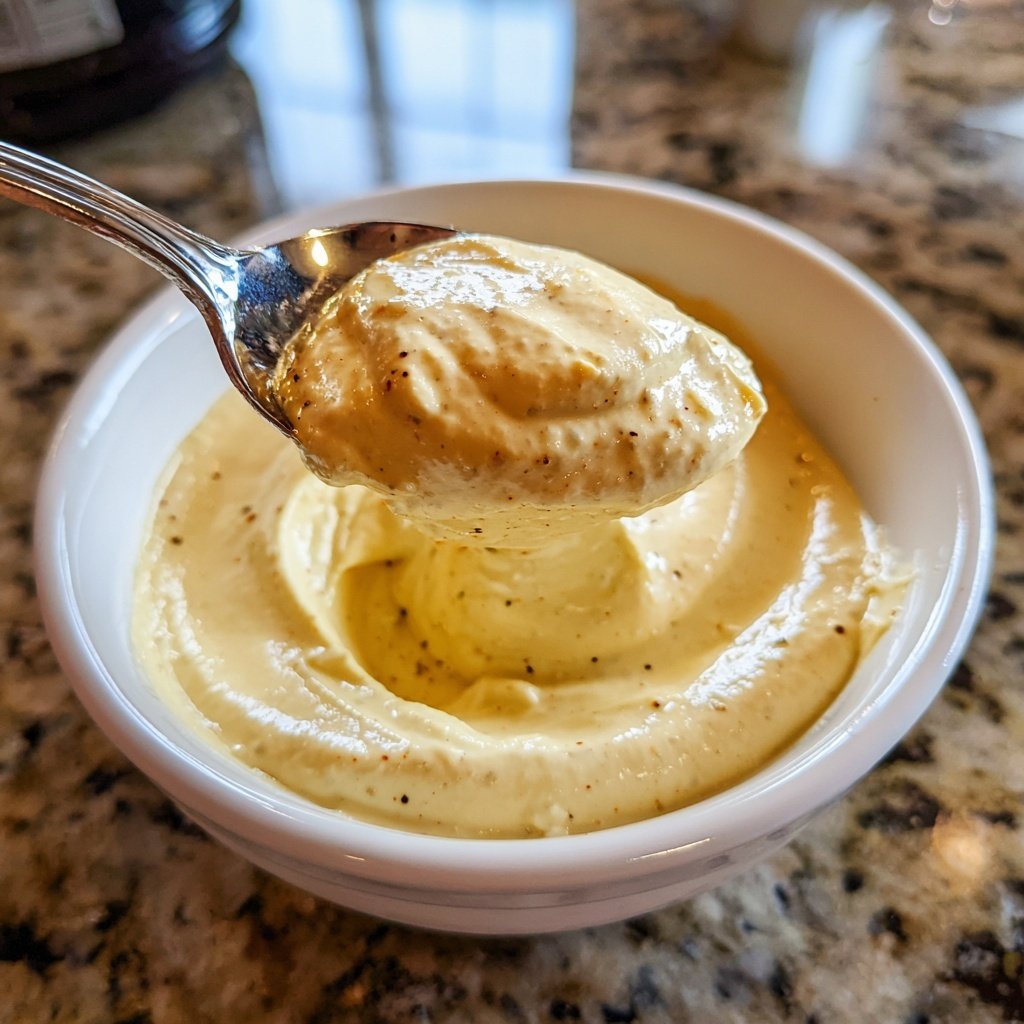
Homemade Garlic Aioli Sauce
Highlighted under: International Flavor Classics
I love making my own garlic aioli sauce because it’s incredibly easy and tastes so much better than store-bought versions. With just a few simple ingredients, I can create a creamy, garlicky dip that elevates everything, from fries to sandwiches. What’s more, I can adjust the garlic to my personal taste—whether I want it mild and subtle or bold and punchy. Once you try it, you might never go back to the jarred stuff again!
When I first attempted to make homemade garlic aioli, I was amazed at how quickly I could whip it up. The combination of fresh garlic and creamy mayonnaise is a game changer. I also found that using high-quality olive oil really enhances the flavor, making it richer and more decadent. Always start with a teaspoon of garlic, and then add more if you crave that robust flavor!
Over time, I’ve experimented with different variations by incorporating herbs like basil or spices like smoked paprika to give the aioli a unique twist. This flexibility means I can easily match it to the dish I’m serving it with, ensuring that each batch is just as delicious as the last.
Why You'll Love This Recipe
- Creamy, rich texture that's perfect for dipping or spreading
- Fresh garlic flavor that you can adjust to your liking
- Versatile sauce that pairs well with many dishes
The Role of Garlic
Garlic is the star ingredient in aioli, providing that distinctive flavor. When using fresh garlic, you have control over its intensity; either opt for fewer cloves for a milder taste or increase the quantity for a punchier experience. Minced garlic also releases a peppery quality, which can enhance the overall profile. If you find raw garlic too strong, consider roasting it beforehand for a sweeter, caramelized flavor that still shines through in the aioli.
Aside from providing flavor, garlic offers health benefits, such as antimicrobial properties and potential heart health benefits. These perks make your homemade aioli not just tasty but also a slightly healthier option compared to store-bought kinds that may include preservatives or artificial flavors.
Choosing Your Oils
While olive oil is a common choice for making aioli, the type of oil you choose can greatly affect the final flavor. Extra virgin olive oil offers a fruity, slightly peppery flavor, while a light or refined olive oil will provide a more neutral taste. If you prefer a milder flavor, feel free to use vegetable or canola oil instead. However, remember that the quality of the ingredients will shine through in the final product, so select a good-quality oil for the best results.
For an exciting twist, consider adding different oils. A touch of sesame oil can bring a delightful nuttiness, or infusing your olive oil with herbs can create a unique flavor profile that pairs beautifully with roasted vegetables or grilled meats.
Storing Your Aioli
Homemade aioli can be stored in an airtight container in the refrigerator for up to one week. If you're making it in advance for a gathering or meal prep, keep in mind that flavors often intensify over time, especially the garlic. To mitigate any overwhelming garlic taste, ensure it’s consumed within a few days if you’ve added a higher amount of garlic.
If you have leftovers, think about repurposing the aioli beyond being a dip or spread. It can be a flavorful dressing on salads, a marinade for chicken or fish, or even a unique addition to potato salad or pasta dishes. Experiment with incorporating it into your meals to make the most out of this versatile sauce.
Ingredients
Main Ingredients
- 1 cup mayonnaise
- 3 cloves of garlic, minced
- 2 tablespoons lemon juice
- 1 tablespoon olive oil
- Salt and pepper to taste
Instructions
Combine Ingredients
In a mixing bowl, add the mayonnaise, minced garlic, lemon juice, and olive oil. Stir well until all ingredients are thoroughly mixed.
Season to Taste
Add salt and pepper according to your preference. Taste the aioli and adjust the garlic or lemon juice as needed for a stronger flavor.
Chill and Serve
Cover the bowl and let the aioli sit in the refrigerator for at least 30 minutes to allow the flavors to meld together. Serve with your favorite dishes!
Pro Tips
- For a lighter version, you can substitute half of the mayonnaise with Greek yogurt. Additionally, if you prefer a smoother texture, blend the ingredients in a food processor instead of mixing them by hand.
Serving Suggestions
This garlic aioli is incredibly versatile! It makes a perfect dip for crispy French fries, but don’t stop there—try it with roasted vegetables, pizza, or even as a dressing for grain bowls. I also love spreading it on toasted bread for a quick and delicious sandwich base, elevating everything from turkey to veggie options.
For parties, consider adding a variety of dippers alongside your aioli, such as fresh vegetables like carrots and cucumber or crispy chips. It's a crowd-pleaser that enhances the eating experience, making it ideal for gatherings. Pair it with your favorite cocktails or craft beers for the ultimate snack platter.
Adjustments and Variations
Feel free to experiment with additional flavors in your aioli. Stirring in fresh herbs such as parsley, chives, or dill can create refreshing variations, perfect for summer meals. A dash of smoked paprika or even a tiny drizzle of sriracha can inject a little heat and depth, catering to different palates.
For a lighter option, consider substituting half of the mayonnaise with Greek yogurt. This will give you a tangy twist while also reducing calories. Alternatively, if you prefer a vegan option, you can create a plant-based aioli by using aquafaba (the liquid from canned chickpeas) and a vegan mayonnaise as your base.
Troubleshooting Tips
If your aioli seems too thick, simply thin it out with a little water or more lemon juice until you reach your desired consistency. Conversely, if it’s too thin, adding a bit more mayonnaise can help restore the creaminess. The balance between mayo and other ingredients is key to achieving the perfect texture.
If your aioli tastes overly salty or garlicky, add a pinch of sugar or an additional squeeze of lemon juice to balance out the flavors. Always taste as you go to create the perfect blend that fits your personal tastes and ensures a delicious outcome.
Questions About Recipes
→ Can I use garlic powder instead of fresh garlic?
While you can, fresh garlic gives the best flavor. If you use garlic powder, start with 1 teaspoon and adjust to taste.
→ How long does garlic aioli last?
Homemade garlic aioli can be stored in the refrigerator for up to one week, but make sure it's in an airtight container.
→ Can I add other flavors to the aioli?
Absolutely! You can incorporate herbs like parsley, dill, or spices like cayenne pepper for a kick.
→ Is this recipe dairy-free?
Yes, this aioli recipe is dairy-free since it uses mayonnaise as the base.

Homemade Garlic Aioli Sauce
Created by: Ainsley Harper
Recipe Type: International Flavor Classics
Skill Level: Easy
Final Quantity: 1 cup
What You'll Need
Main Ingredients
- 1 cup mayonnaise
- 3 cloves of garlic, minced
- 2 tablespoons lemon juice
- 1 tablespoon olive oil
- Salt and pepper to taste
How-To Steps
In a mixing bowl, add the mayonnaise, minced garlic, lemon juice, and olive oil. Stir well until all ingredients are thoroughly mixed.
Add salt and pepper according to your preference. Taste the aioli and adjust the garlic or lemon juice as needed for a stronger flavor.
Cover the bowl and let the aioli sit in the refrigerator for at least 30 minutes to allow the flavors to meld together. Serve with your favorite dishes!
Extra Tips
- For a lighter version, you can substitute half of the mayonnaise with Greek yogurt. Additionally, if you prefer a smoother texture, blend the ingredients in a food processor instead of mixing them by hand.
Nutritional Breakdown (Per Serving)
- Calories: 180 kcal
- Total Fat: 18g
- Saturated Fat: 2g
- Cholesterol: 10mg
- Sodium: 200mg
- Total Carbohydrates: 2g
- Dietary Fiber: 0g
- Sugars: 1g
- Protein: 1g